LPC-2148 USB Bootloader
Oran Maor (oran.maor@gmail.com), Tal Sharon(talsharonts@gmail.com)
Introduction
We programmed into the LPC2148 board a bootloader mechanism, which enables the user to program the device through the USB port instead of the UART port.
This is accomplished by two components:
1. a limited USB mass storage device, enabling the user to copy a HEX file content onto the LPC2148 board.
2. a bootloader program, which it's task is to get the user program to run in RAM.
Motivation
Our USB bootloader solves a couple of problems which every LPC1248 user should encounter:
1. Download time - programming the LPC1248 through the UART is extremely slow. For instance: a 50KB program would take about 35-40 long seconds to download onto the board. Using our bootloader the download process would take less than a second.
2. Download software redundancy - traditionally, in order to program the LPC1248 board, the user have to use a download program such as LPC21ISP. Using our bootloader makes such program redundant. All that the user need is a USB cable and he is good to go.
3. Running in RAM - Running a program in RAM achieves greater running speed, and enhances the program performance. Running a program on the board's RAM instead of on the the board's ROM, is a hard task, which any LPC1248 programmer would find difficult. Using our bootloader, the only thing the user has to do is to compile it's program the way we instruct him, and it's program would run in RAM after being copied to the board.
Usage
The first thing you need to do is to compile a program, which you are interested to download onto the LPC2148 board.
In order to create a runnable program you have to compile your program using the supplied MAKEFILE and LD script:
1. Write your code.
2. Change the target in "makefile.local" to be your program.
3. Using linux shell, compile your program using the command "make".
You should now have a HEX file with the the compiled program's data.
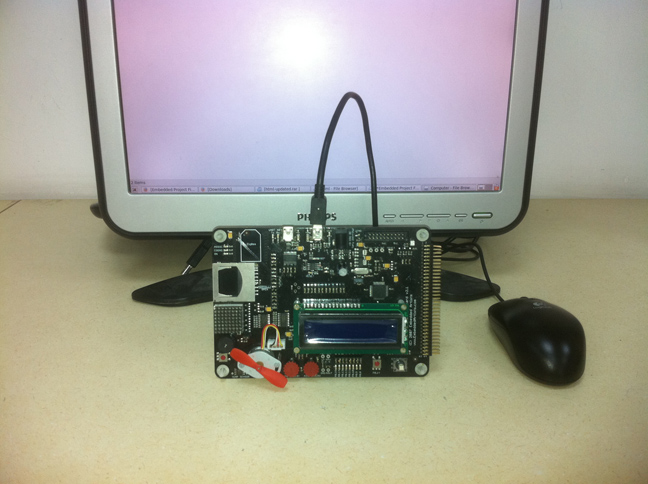
Simply attach the device to the host computer and wait for the OS to mount the filesystem.
When the mounting process is Finished, you should be able to find a single file named "program.hex".
This file's content is initially full of meaningless bytes. The user should change it's content, and replace it with the content of a HEX file representing the user program.
Once the file's content has changed, the bootloader will read this file's content, and assuming the content is a proper HEX file, it will copy the data to the RAM and will start the user-program execution.
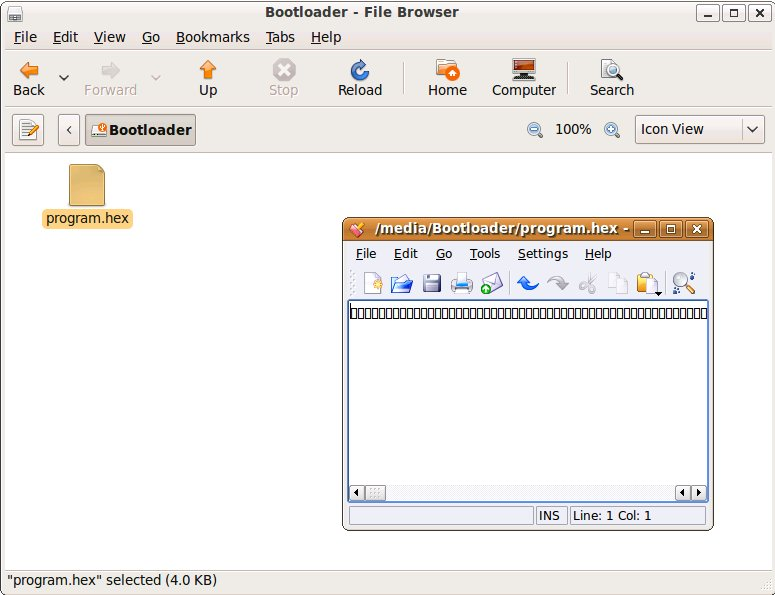
Editing "program.hex". Saving this file would start the bootloader, and the user-program will be executed. Notice the initial meaningless contents of "program.hex".
Writing can be performed using ubiquitous applications such as Notepad on Windows or Pico on Linux. Naturally, writing can also be performed using the OS shell, scripting languages, shared filesystems, etc...
Limitations
Our very limited mass storage device, enables the user one option only: to copy the contents of a HEX file to a specific file named "program.hex". This is due to the face that the mass storage device was not the main target of our project, but a necessary component to accomplish our task. Our project focused on creating a platform which enables the user to run it's programs on the RAM rather than on the ROM. That is why we used an existing project which we found suitable to our needs. Although this is not a perfect solution, we feel it is quite sufficient for our purpose.
One more limitation is regarding the user-program size. The USB mass storage device, which we made only slight changes to it, take a lot of the RAM's space. Eventually we managed to enable the user 4KB of RAM for it's program. We aware that this is not a very large amount, but again, this is something which seems very easy to fix if someone should find this issue important enough.
Design
Mass Storage Device
In order to enable the user a USB platform, we used a mass storage device project from previous years. Once again, it is not a perfect solution, but we were able to change it and make it sufficient for our purposes.
We will discuss the mass storage device component very briefly, since it is not our main focus. For elaborate details, use the original project's data sheet:
http://courses.cs.tau.ac.il/embedded/projects/fall2009/LSD/.
Original mass storage device project summary
The original project programmed the LPC2148 to function as a USB mass storage device.
When the user connected the board to a computer through a USB cable, the user could see a few predefined directories and files in the root folder of the board.
Each such predefined file was controlling a specific peripheral of the LPC2148 board.
Any change was made to a file, resulted in an immediate change to the atached peripheral.
This was achieved by using a special "write" method, which every time it was being called, it called another method which handled the peripherals actual functionality.
Altering the mass storage device to our needs
We, of course, had no interest in the peripherals functionality added to the mass storage device system.
We removed all of the code involving the peripherals mechanism.
We also removed all of the predefined files and directories, and replaced them with a single file named "program.hex".
Finally, we created a "write" method of our own, similarly to the special "write" method of the original mass storage project, only ours didn't call the peripherals method. Instead, it called the bootloader method.
The Bootloader
Our bootloader performs two tasks:
1. Copying the user-program data to the RAM.
2. Starting the user-program execution.
Copying the user-program data to the RAM

LPC2148 Memory Map. The bootloader copies the user program to RAM (Address 0x40000000), Remaps the interrupts vector, and then launches it.
After the user copies it's program into the file "program.hex", the bootloader copies all of the user-program's data to the RAM (address 0x40000000).
The bootloader assumes that the data is in HEX file format, and it parses the file accordingly, similary to the way a standard programmer software, such as "lpc21isp", would.
The bootloader's parser goes over the HEX file line by line, and copies the program's data to the RAM.
Starting the user-program execution
Once the copying process has finished, the bootloader can start the execution process.
The first thing it does is to remap the interrupts vector table to the RAM. This is performed in order to enable the user to download on the board interrupt driven programs. Without remapping the interrupts vector, such programs would not work.
After remapping the interrupts vector, the bootloader executes the code found on address 0x40000000, which by now holds the user-program first assembly command.
Implementation
The Bootloader project located in the project's folder.
Our Project Experience
This project was very challenging to us, due to the fact it is a vry low-level project. Contrary to other projects, which focused on programming high-level applications using the LPC2148 interface, our project focused on the application launching mechanism, which involved editing ld scripts, startup files and handling issues which supposed to be trivial to the common embedded programmer. Since we didn't have a debugger in hand, we practically worked for most of the project in a test-and-error method. Obviously, this method is not a very good one, and it slowed our progress greatly. We had to guess what we did wrong everytime things didn't work as expected, try and fix it, and if we were wrong, try a different approach. We feel that a debugger would have been a great help for us, and probably would have advanced the project further.
Another issue we encountered was the lack of information online regarding RAM running in LPC2148. Not a lot of coherent information was found about this particular subject, and again, we had to use a test-and-error method. One of the most frustrating problems we confronted was at the very start of our work, whn we tried to run a program for the first time in RAM instead of ROM. WE thought that should be rather easy, but it turned out to be a major challenge. Eventually it turned out that by Allocating the program to the start of the RAM (Address: 0x40000000), we overriden the LPC2148 self-bootloadeing mechanism, which launches the user program. We needed to leave some "blank" space (approximately 200 bytes) for the LPC2148 bootloading mechanism to use. By the time we figured that out, we had a real good understanding of the memory map of the LPC2148, a field we didn't know a lot about starting our project.
Although challenging, this was a fun project in embedded programming, and we learnt a lot while working.
Conclusions
When we started to work on the project, we knew we are entering an uncharted terittory. While during the workshop we focused on high level applications, this was a whole other story. We figured we probably would not accomplish all of our targets, but in the end we arrived to an impressive milestone. Our bootloader is capable of launching an interrupts-driven user-program on RAM!
We learnt a lot while working, and now have a great understanding of the LPC2148 "guts" in particular, and embedded programming in general.
We think our project could be of use to other future projects, should they concern RAM running and other uncommon features our project features.